History Of Photography
|
|
TIMELINE.
|
CAMERA OBSCURA

The camera obscura was inspired
by the original creation made by alhazan we started off with plain black paper nothing too big and with a few folds we turned it into a box with two open sides we then got some tracing paper and traced a box out of it and stuck it on two the two open sided box we then had to get a black piece of card and withy a little handy tricks we cut a small square we tested it against a window but it was still blurry because the box was still incomplete what we then had to do was attach a small magnifying glass but we needed it to be in full focus so we measured it with a ruler and stuck it on .And there it was a full functioning camera obscura.
by the original creation made by alhazan we started off with plain black paper nothing too big and with a few folds we turned it into a box with two open sides we then got some tracing paper and traced a box out of it and stuck it on two the two open sided box we then had to get a black piece of card and withy a little handy tricks we cut a small square we tested it against a window but it was still blurry because the box was still incomplete what we then had to do was attach a small magnifying glass but we needed it to be in full focus so we measured it with a ruler and stuck it on .And there it was a full functioning camera obscura.
DSLR Guide
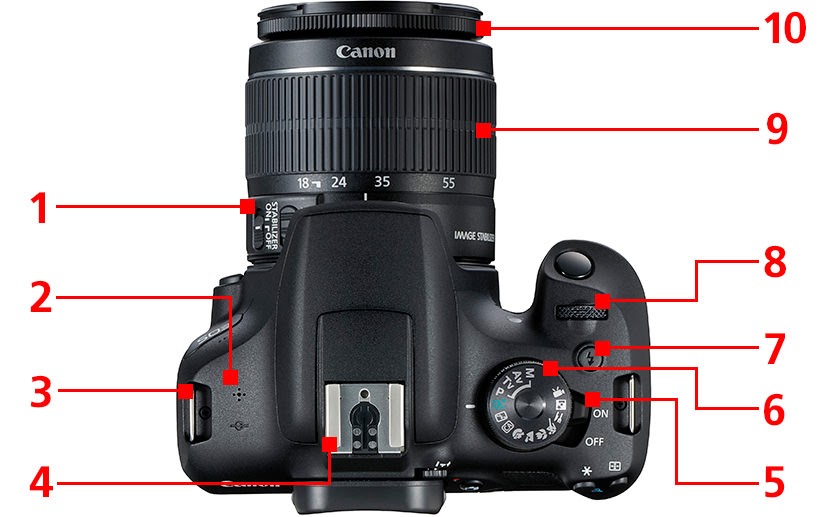
1. Focus Mode Switch, to switch between auto and manual focus
2. Speaker, to play back recorded audio
3. Strap mount, where the strap attaches to the camera
4. Hot shoe, this is where you attach a flash
5. Power switch, On/Off button
6. Mode dial, use this to switch modes
7. Flash button, use this to trigger the built in flash
8. Main dial, multi purpose dial
9. Zoom ring, Zoom In/Out
10. Focus ring, Focus when the camera is on auto-focus
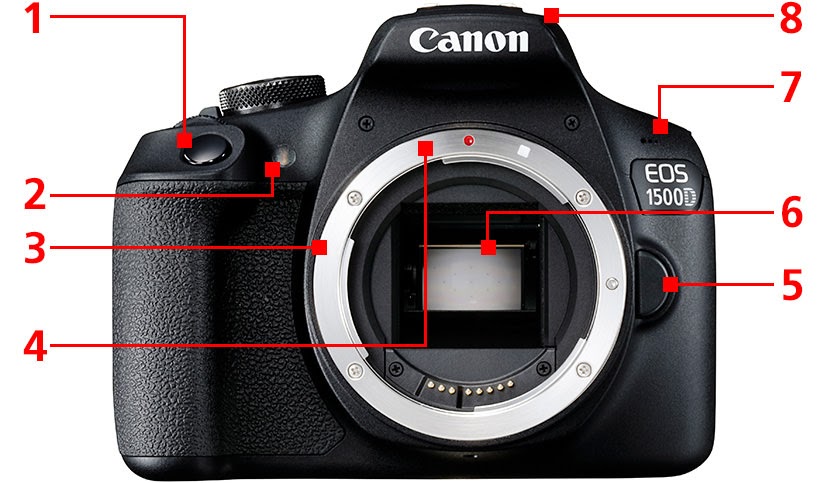
1. The shutter, press button to take picture
2. Red eye reduction, Makes sure eyes aren't red
3. Lens mount, fit the lens to the camera
4. The lens flex, helps you put lens on
5. Lens Release Button, press this to detatch lens
6. Mirror, It reflects light from the lens
7. Microphone, built in microphone
8. Built in flash, Used to bring light to a dark place
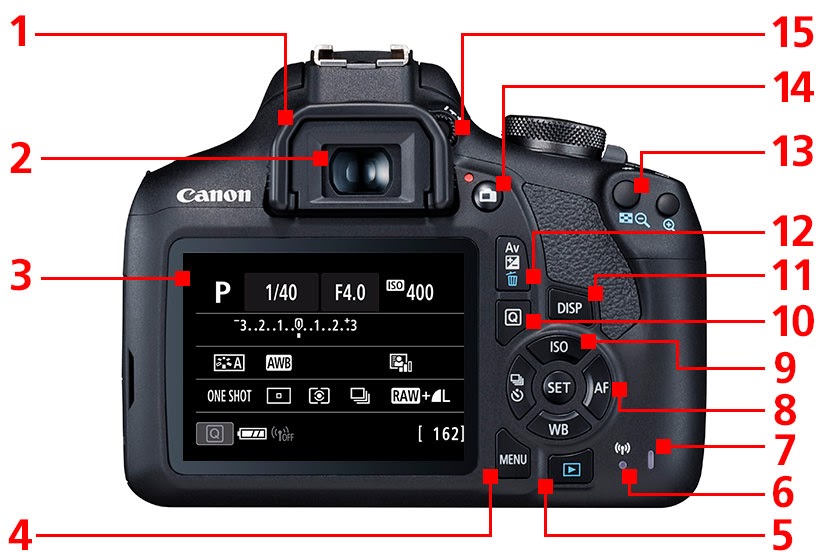
1. eyecup ,the eyecup prevents external light from entering when your eye is in contact with the eyepiece
2. view finder eyepiece, the viewfinder eyepiece is a small window on the camera which you look through
3.LCD monitor, in addition to the shooting settings shown in the illustration here, the captured image
4. MENU button,Use this button to display the menu for adjusting the different camera functions
5. playback button, this is the button for playing back images you have captured.
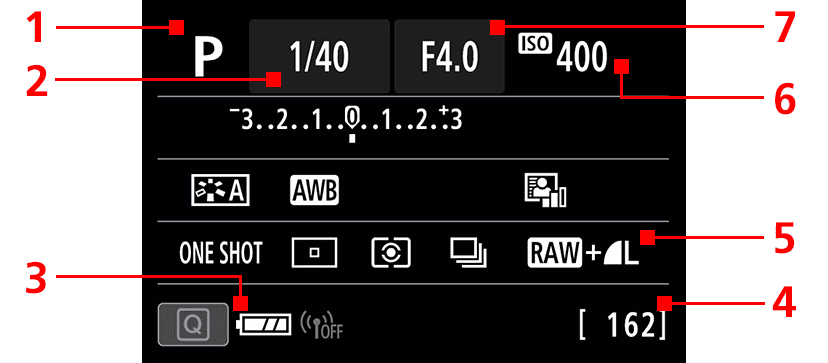
1. Shooting Mode, Displays the text or icon corresponding to the shooting mode you have selected
2. Shutter Speed, Displays the time interval during which the shutter is open
3. Battery Level, Displays the remaining battery level with an icon
4. Shots Remaining, Indicates the number of remaining shots that can be captured
5. Image-recording quality, Displays the image-recording quality
6. ISO Speed, A higher ISO speed makes it easier to capture shots of a dimly-lit scene
7. Aperture Value, this indicates the extent to which the aperture blades inside the lens are open
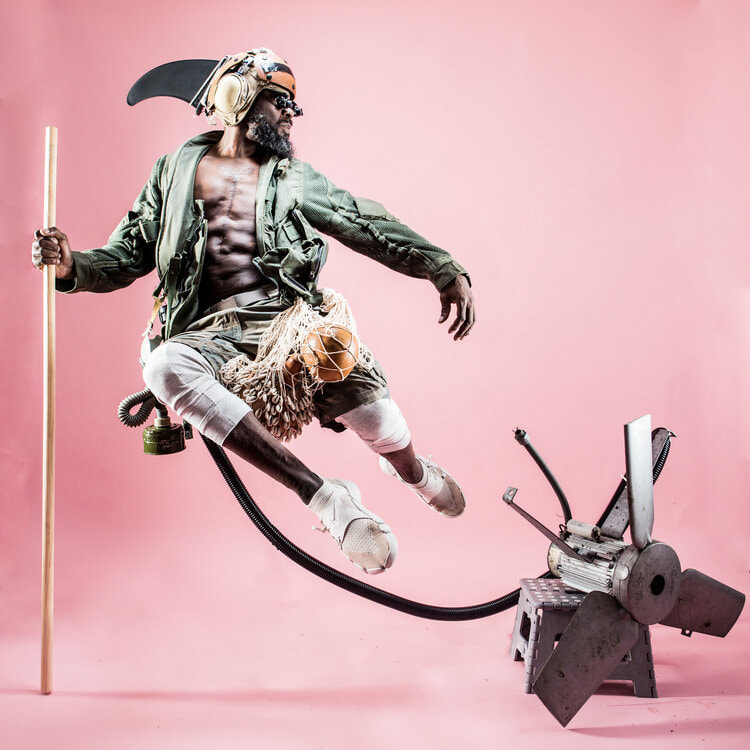
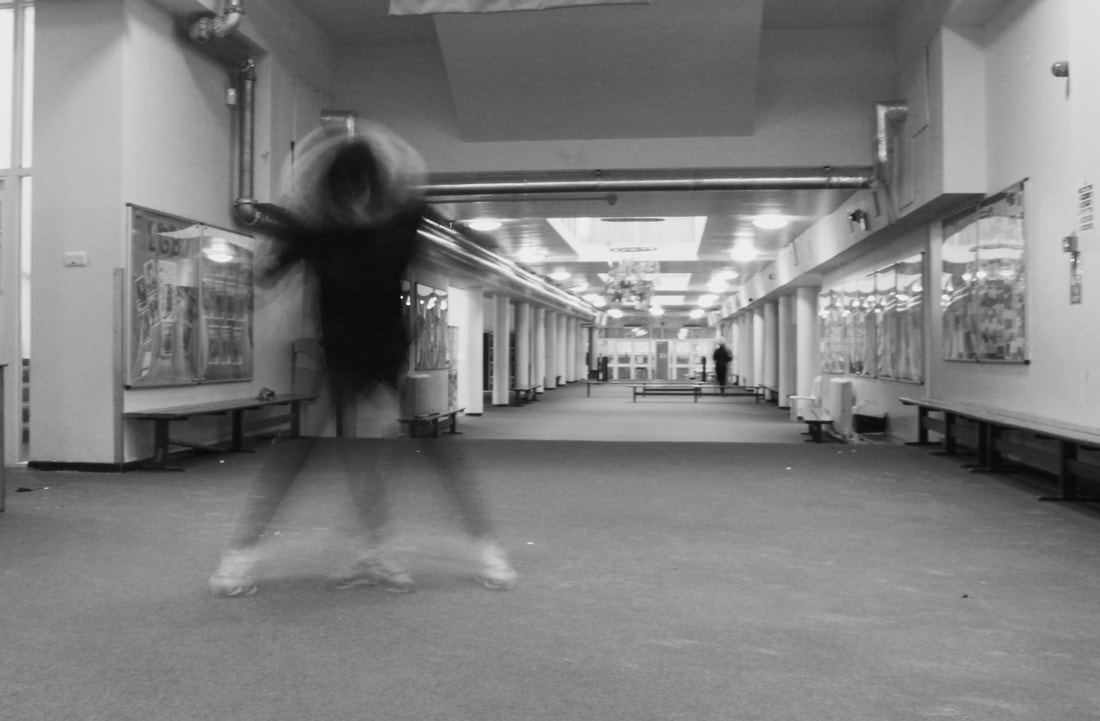
SHUTTER SPEED
here we took the photos is 250/1 to make it look like Abdi was floating when he jumped off the ledge this took a few tries and a few fails but we managed to get this masterpiece.
here we took the photos is 250/1 to make it look like Abdi was floating when he jumped off the ledge this took a few tries and a few fails but we managed to get this masterpiece.

|

|
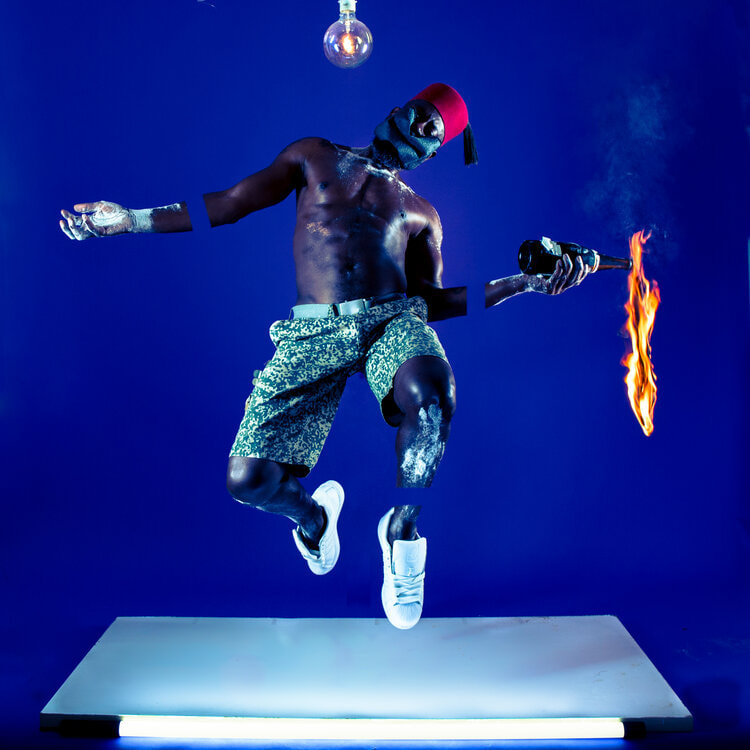
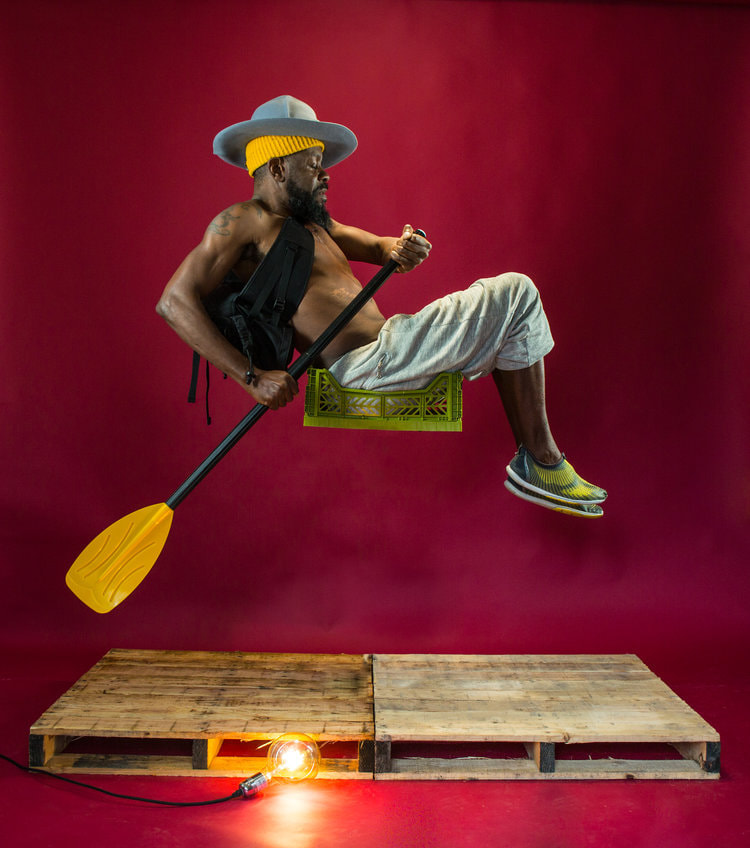
BENJI REID
|
|
|
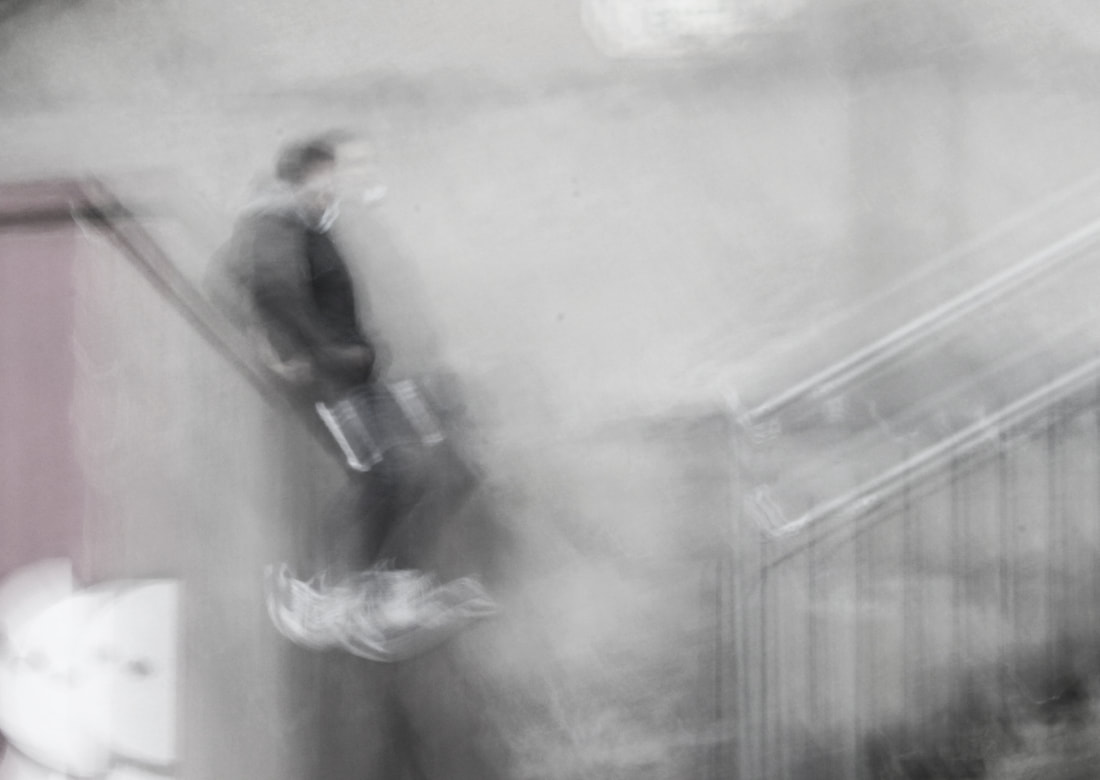
These picture were taken by Benji Reid recently.In his photographs he makes people look like they are floating in most of his photos, these kind of photos fit into a genre called levitation. When a camera shutter speed is set to a high number it takes a picture of someone or something in the exact moment it moved. The reason why he takes these photos because he has always desired freedom that is why he is always moving freely like there is no chains bonding him
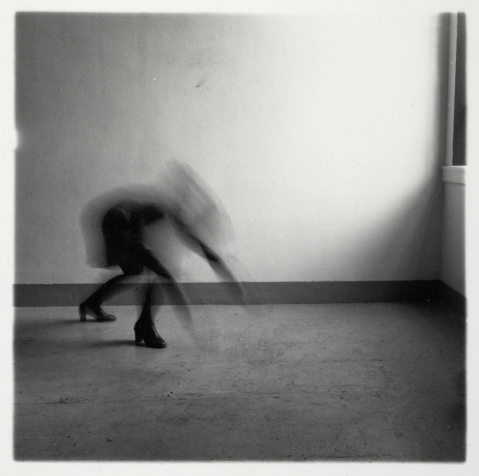
Francesca Woodman
|
Francesca Woodman tried to make herself look like a ghost. She made half her body blurry to get the ghost like appearance the whole photo has the intent to fool the viewer because we cannot see her face so we do not know the whole mood of this photo we know that she is trying to get the impression of a ghost because you cannot see a ghosts face.
|
|
In my response to Francesca Woodman work we recreated it so it can be an exact copy. We shook a single part of our bodies to get that ghost like appearance we set the shutter speed at 1' second so could not capture us in the moment of shaking our heads also we shook the camera so the background can be shaking so it can fit with the photo shop that we used to amplify these pictures.
|
APERTURE
F29 ISO1600 Shutter speed1/30
|
F4 ISO1600 Shutter speed1/250
|
Aperture is the name of a whole in the camera lens. The aperture settings that can be applied manually or automatically can determine, and have an impact on the amount of focal range you put in. For example taking a picture of three people or three distinct objects that are different to each other you can see whats in focus and what isn't this has because of the aperture settings
RULE OF THIRDS
|
|
The Rule of Thirds is when you imagine your picture is divided into thirds both horizontally and vertically. The intersections of these imaginary lines suggest four options for placing the centre of interest for good composition. The option you select depends upon the subject and how you would like that subject to be presented.
GIF

|
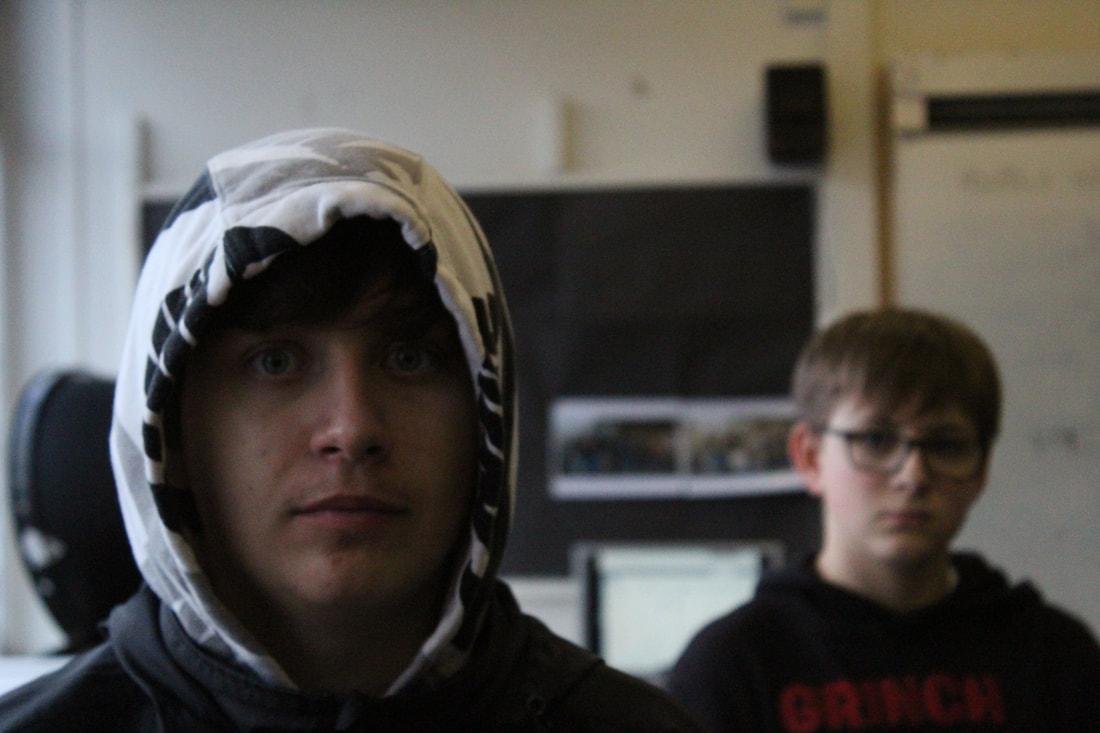
In this task I took 9 photos of Nathan to form a GIF. we took each individual photo of his head facing a different direction and when we put it all together it forms a kind of stop-motion infinite video (his head was facing left, up, right, and down and with each interval between them he was going to the middle)
|
ROMAIN LAURENT

This piece of work that I was inspired by is the work of Romain Laurent her particular way of interpreting GIF'S in in his own way is unique. Especially in this photo here he creates an illusion of a woman dressed in a water dress like its a modern day gradually checking her her phone every second.
